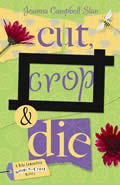
First line: “All we’re missing is a corpse.”
From the back cover: All it took was one scone. When the hot-tempered (and widely hated) hobbyist Yvonne Gaynor eats a tainted pastry at Kiki’s scrapbooking crop party, it triggers an allergy that leads to Yvonne’s death. Even worse, the police suspect foul play when they realize that someone tampered with the treats and swiped the victim’s allergy medication.
An expect at stealing design ideas, Yvonne had enough enemies to fill a memory album. Soon, the scrapbooking community pins her murder on Kiki’s friends and our ace scrapper finds herself dealing with anti-Semitic threats at the shop, a quarrelsome pre-teen daughter at home, a meddle-some mother-in-law, and constant financial pressure. Despite help from the handsome yet annoying coy Detective Detweiler, Kiki has her work cut out for her in solving the crime.
My thoughts: Another fast-paced, humorous book. Kiki is an engaging heroine who must deal with the angst of a teenage daughter, a brow-beating mother-in-law, avid scrappers, and a handsome hot-and-cold boyfriend. Using her quick wit and thirst for the truth, Kiki searches for a killer while trying to balance her personal life, attacks on her work place, and issues with her romantic relationship. Once again, the plot involves twists and turns that you don’t see coming. This book has everything you could want..a perfect blend of mystery, drama, romance and of course, scrapbooking tips!
Here’s a fun tip from Cut, Crop and Die:
Kiki’s Subtitle-Within-A-Title Technique
(Inspired by a similar step-by-step created by Venessa Matthews and featured in the May 2006 issue of Scrapbook Inspirations magazine.)
This idea gives your titles a cool, fresh, and funky look – plus it allows you to add extra information about your page or project.
You’ll need letter stamps at least 2″ high, ink or acrylic paint, a pen, temporary adhesive, and a strip and a large piece of waste paper.
- Choose a word to be the predominant portion of your title (Example: let’s use HOLIDAY)
- Roughly stamp out your predominant word on your waste paper. This will be used as a pattern to help you figure out dimensions for Step 3.
- Cut a strip of waste paper 3/8″ wide and 1″ longer than your predominant word. (For example, use your pattern of HOLIDAY to figure out how long to make your strip of waste paper.)
- Figure out where you want your title to go on your “good” paper. Adhere that strip with removable glue (HERMA Dotto is perfect) so it will run through the middle (top to bottom) of your predominant word – so the strip will run smack through the horizontal middle of HOLIDAY, almost like a lane stripe runs down the center of a road – through your desired background. The strip will run horizontally across the middle of your title.
- Ink your letter stamps and stamp the predominant word (HOLIDAY in our case) right over the top of strip of waste paper. Remember to center the letters as you stamp them, so the strip runs through the middle, top to bottom, of the word.
- Let the stamped word dry. Remove the strip of waste paper.
- In the un-inked space – the blank, unstamped area between the top and bottom of your letters – you can now write a subtitle or message with your pen. (Example: You would have printed out the word HOLIDAY, but in the middle of the word there’s a blank space 3/8″ wide. There you could write the words “family traditions.”)
Note: Of course, you could also use a stencil instead of a stamp for your letters. Follow the steps to #4. Instead of using the stamps, stencil in each letter by dabbing paint or ink through the negative space.
Copyright 2010, Joanna Campbell Slan. Cannot be reprinted without permission from Midnight Ink, the publisher.
(I borrowed this book from the library.)